
It's the last day of the May Papertrey Ink Countdown and do I ever have some projects to show you! I mentioned previously that I have some new stitching die products coming out this month. Looking forward to sharing those with you today. And I've also got two more Craft Brew cards.
The girls are all making masculine projects for today's group post and I'll play along with the first of my many shares.
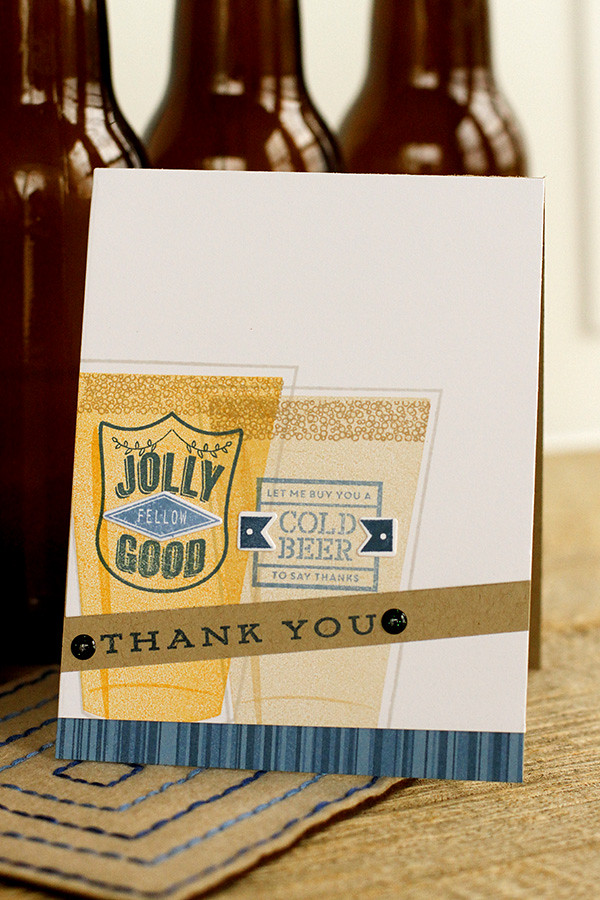
I have a card with two pints of beer stamped from the Craft Brew stamp set. The two beer logos go together in a way, so it works nicely.
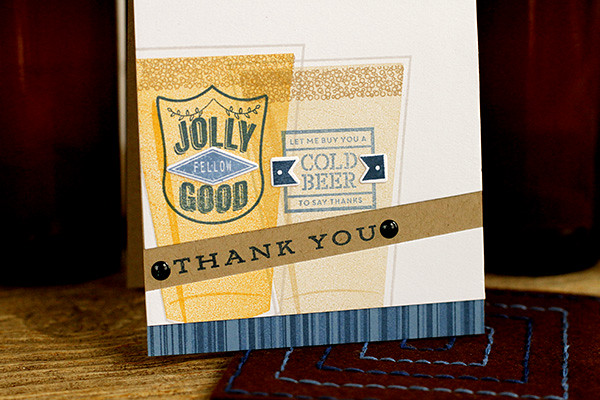
I cut the white panel with one of Maile's Sentiment Split Dies. And the blue border on the bottom was stamped with Background Basics: Random Stripe on Blueberry Sky with Blueberry Sky and Enchanted Evening Ink.
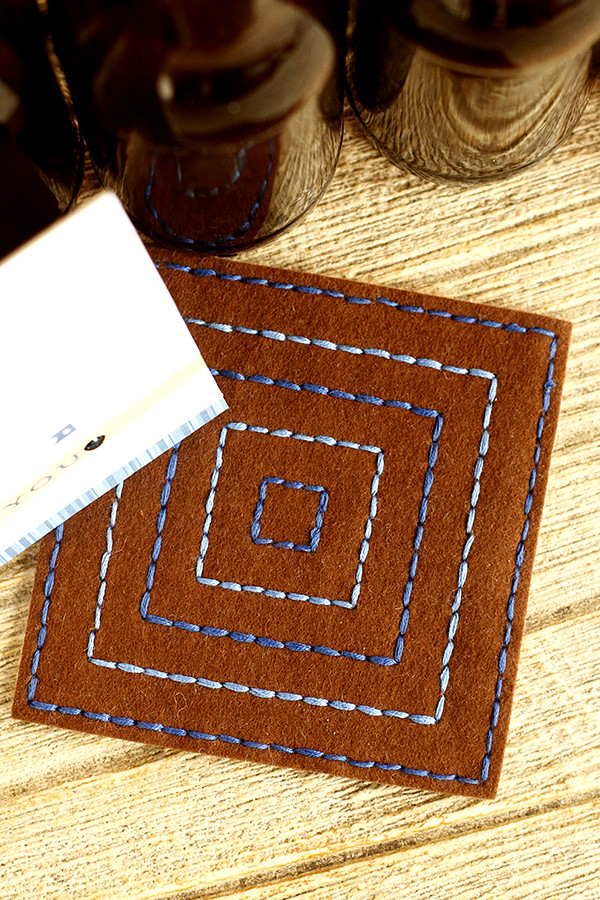
To go along with the beer theme, I've got Stitched Coaster Dies to create a quick gift with a beer themed card. This was all a result of a conversation I had with Matt one night (at a pub no less!) about how he didn't care for our ceramic coasters at home. I thought I could make something to his specifications. Anything to get him to happily use a coaster, right? So here you go, 100% man approved.
The basic Stitched Coaster Die consists of a large holes and shape" square die and four separate "holes only" dies that size down and nest inside. It seemed like a waste to not use the space within the large square die. I always try to pack as much value into my designs as possible. The "holes only" squares that created this quilted look was the solution this time around to that. Because they are all separate dies (the come wired together), you can use any combination that you'd like for various different looks. Here I used them all and alternated two shades of blue floss from the outside in on a Dark Chocolate felt coaster.

On the backside, the stitching goes all the way through to make this particular coaster reversible on a Classic Kraft felt background. I made sure that the colors I used matched the card I created. I used all six strands of floss on this coaster for a very bold look.
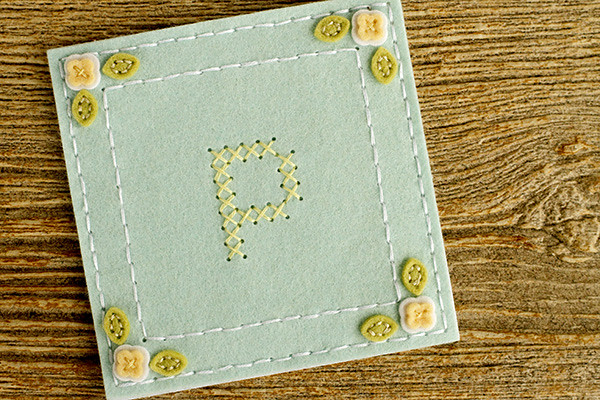
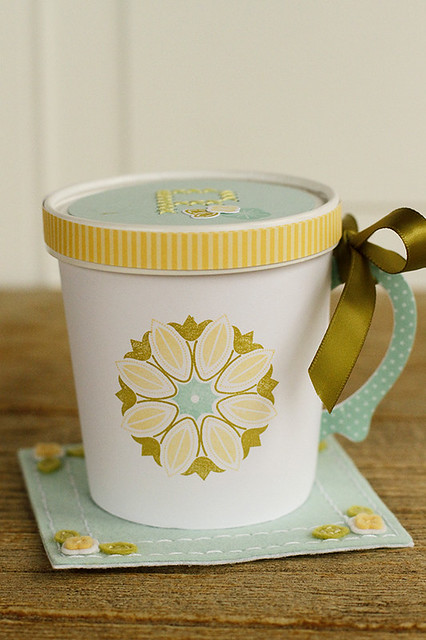
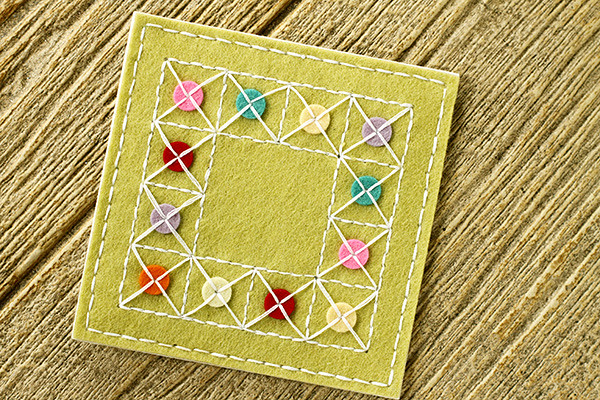
How about I zig now and let everybody else zag, by making a feminine coaster and gift set? Just to change it up a bit. First up, the coaster. Again, I used the Stitched Coaster Dies. This time, I only used the two largest squares (the largest is "holes and shape" and the second largest is "holes only") to make a coaster with a border. Within the border, I stitched a floral design using the Floral Cluster Stitching Dies (they'll be available this month too individually in addition to still being available in the Quick Stitch: Sewing Staples Kit). A monogram was added in the middle using the Cross Stitch Alphabet Dies. Lovely pairing.
To gift along with the coaster, I used the Pint Size Wrap Dies to cover a Pint Container. I turned it into a coffee cup by adhering the handle of Cuppa Love to the edge of one cut of the Pint Size Wrap Die. Fun, right? I even used the Cuppa Love stamp set to add a coffee mug motif to the front.
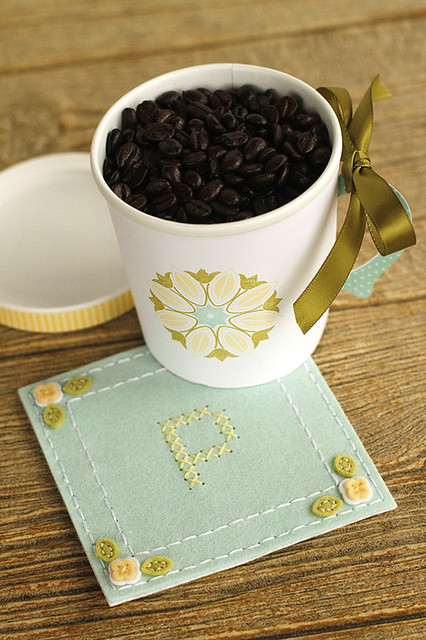
Inside the mug, I added some fancy coffee beans as the consumable part of my gift. This is all a nice change up on the coffee -themed gift.
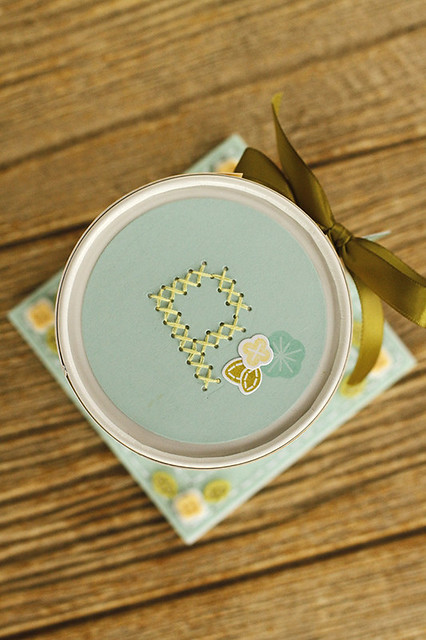
The top of my pint container matches my coaster with the Cross Stitch Alphabet Dies. I used the Quick Stitch exclusive dies and stamps to add paper versions of the flowers and leaves I stitched in felt on my coaster. Only I used them on Aqua Mist paper instead of felt this time. All in all, a sweet gift for a co-worker, friend, or mother-in-law in this case.
I want to note something important here. I used two cuts of the Stitched Coaster Die to create the brown, double-sided coaster. That's a good bit of felt. I know you all want to keep things as economical as possible, so on this particular coaster, my second layer was cut from something else. It is a stabilizer I found at Joann's that is used to stiffen hat brims. And it cuts like butter in your die cut machine. All for $5.99/yard without a coupon. A really great option for you to back your coasters.

I took a photo (excuse the hasty cell phone snap here, I had to improvise that day) so you had all the details to get this material on your own. The stuff came off the bolt and was so stiff, it was still in the bolt shape! Yep, works great with your dies and keeps your coasters flat.
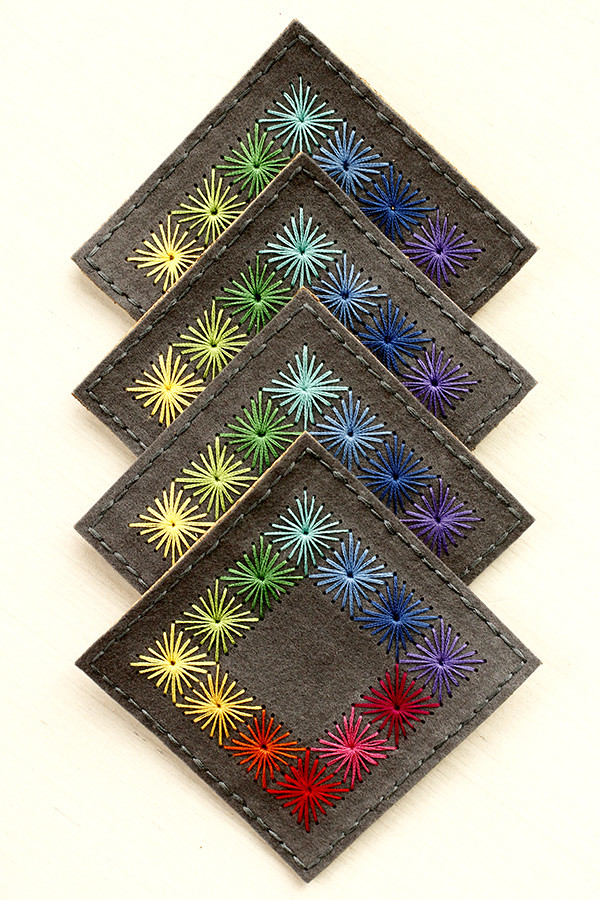
Now to really add even more pizzazz to your Stitched Coaster Die, you can purchase an additional die called Stitched Coaster Square Flair. This thing is a beaut! When I designed it, these foursome of coasters was exactly how I wanted to use it. Rainbow floss on Smokey Shadow Felt. Lovely! A group of hand sewn, felt coasters made with Stitched Coasters and Square Flair would be so well received. What a treasure. Almost too good to use. Good thing you can always make more with other felt and floss combinations.
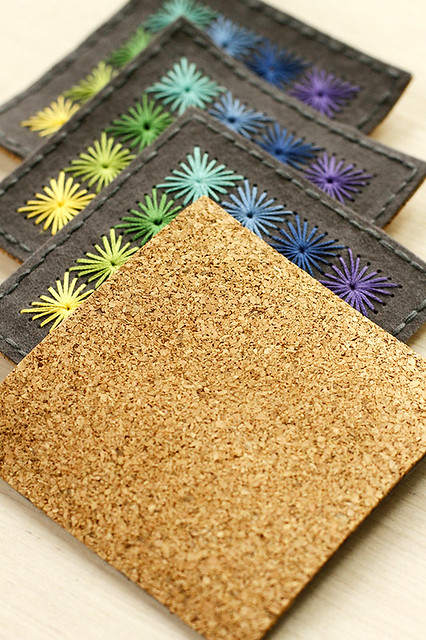
These coasters are backed with cork sheets. The cork cuts fine using the largest Stitched Coaster Die. Be aware, it doesn't cut the holes, however, just the borders of the square. Nothing we can't work around with some double sided tape.

I took a photo (excuse the hasty cell phone snap here, I had to improvise that day) so you had all the details to get this material on your own. The stuff came off the bolt and was so stiff, it was still in the bolt shape! Yep, works great with your dies and keeps your coasters flat.
Now to really add even more pizzazz to your Stitched Coaster Die, you can purchase an additional die called Stitched Coaster Square Flair. This thing is a beaut! When I designed it, these foursome of coasters was exactly how I wanted to use it. Rainbow floss on Smokey Shadow Felt. Lovely! A group of hand sewn, felt coasters made with Stitched Coasters and Square Flair would be so well received. What a treasure. Almost too good to use. Good thing you can always make more with other felt and floss combinations.
These coasters are backed with cork sheets. The cork cuts fine using the largest Stitched Coaster Die. Be aware, it doesn't cut the holes, however, just the borders of the square. Nothing we can't work around with some double sided tape.
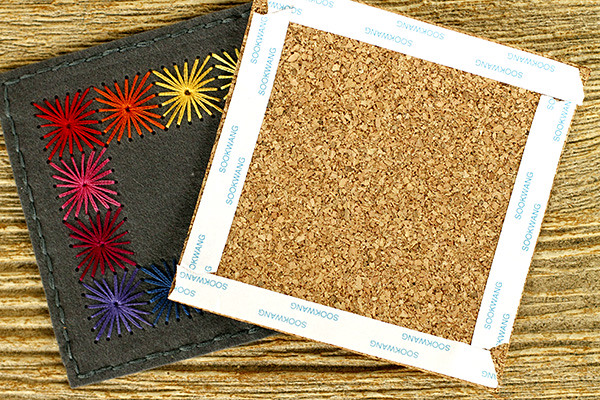
Here's how I applied my tape, so you can do it yourself. Again, trying to be economical here. Cork sheeting is cheaper than felt. Put the tape right up to the edge for a good seal. The floss is what really likes to stick to the tape here, more so than the felt. Still works like a charm.
I have a few more coasters done, but I'll wait until tomorrow to share. These four and a half inch squares have turned into little mini canvases for me. So much possibility when it comes to playing with floss, color, other dies. If you have an itch to stitch up something...anything...these will help you let loose that creativity. We just can't help ourselves sometimes, right?
Next up, probably my favorite little felt project since the Stitched Frame Ornaments for Christmas. These little key fobs are so fun to put together. I think coming off the Softie Kit, I really enjoyed how quick and satisfying these were to put together in a snap. And like the coasters, it's all about playing with your felt and floss colors.
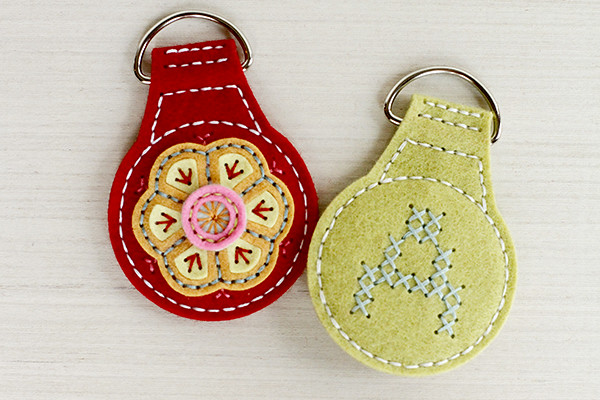
Aren't these just the cutest? And I've got two new detail dies with Stitched Medallion 1 and 2 to use with them that fit within the circle part of the Stitched Key Fob.
Aren't these just the cutest? And I've got two new detail dies with Stitched Medallion 1 and 2 to use with them that fit within the circle part of the Stitched Key Fob.
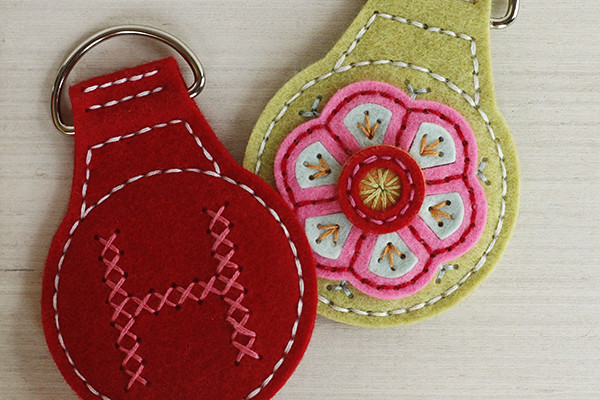
The Stitched Key Fobs have the ability to be double-sided if you so choose. I flipped both of these over to show you the backsides. Again, I'm finding the Cross Stitched Alphabet Dies to be such a good fit here. Sew Stylish Alphabet 1 and 2 would look fabulous as well.
I bought 1.25" D-rings from Joann's to use on these. You can find them even cheaper on Etsy. And tomorrow, when I share a few more key fobs, I'll use 1 inch key fob hardware that I got from this Etsy Dealer. I had them within two days and for 40 cents a piece when you factor in shipping. I got 50 of them...I plan on making lots of these!
I went ahead and put together a quick tutorial video on the Stitched Key Fob, featuring Stitched Medallion 1. Click play to learn more. But honestly, you can probably look at the Stitched Key Fobs and figure out how this goes together if you have any experience with the stitching dies. Super easy.
I went ahead and put together a quick tutorial video on the Stitched Key Fob, featuring Stitched Medallion 1. Click play to learn more. But honestly, you can probably look at the Stitched Key Fobs and figure out how this goes together if you have any experience with the stitching dies. Super easy.
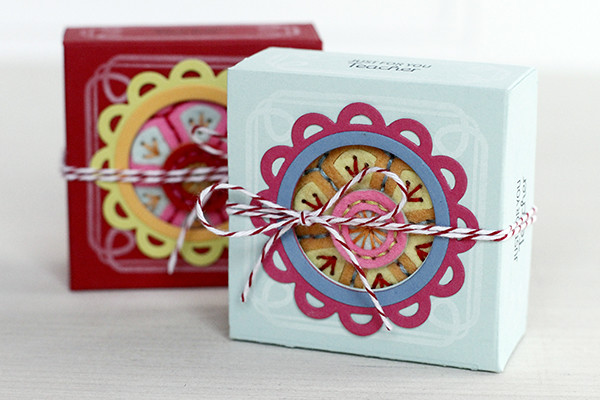
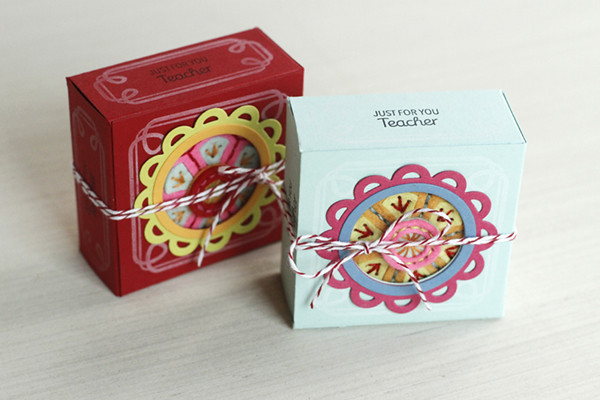
The two key fobs I have here were teacher appreciation gifts for Eliza's preschool teachers last week. These would also make really cute end-of-the-year teacher gifts if you are looking for something like that. I found the Vintage Favor Box stamped with Just a Little Something to be the perfect way to package them up. I used the 1.75" Limitless Layers Circles Dies to create a framed window on the front that teases at the contents of the Vintage Favor Box.
In order to hold the key fob flush to the front of the box, I did have to add some filler to keep them in place. I made sure the filler was fun too. Three Ghiradelli chocolate squares worked perfect. I'm sure you won't have any trouble justifying buying a bag of those to do the same. Especially if there are some left over for you!
To show you the rest of the packaging, I have a few more photos. The open boxes on the sides were stamped with a small sentiment from Betsy's Petite Places: School.
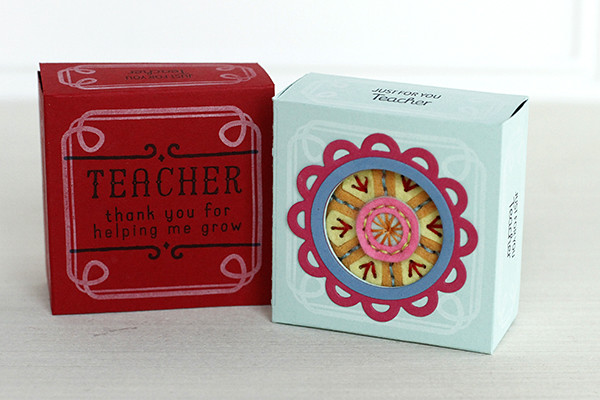
On the back, I stamped borders and a sentiment from Seeds of Knowledge.
So, Stitched Medallion 1. This little sweetie surprised me. I thought there was only one way to stitch her up. Turns out, you can let your creativity take you away on it and do all sorts of things. Here, on this coaster, I used one of the dies from Stitched Medallion 1 to add circles to the center of my Stitched Coaster cut with Stitched Coaster Square Flair.
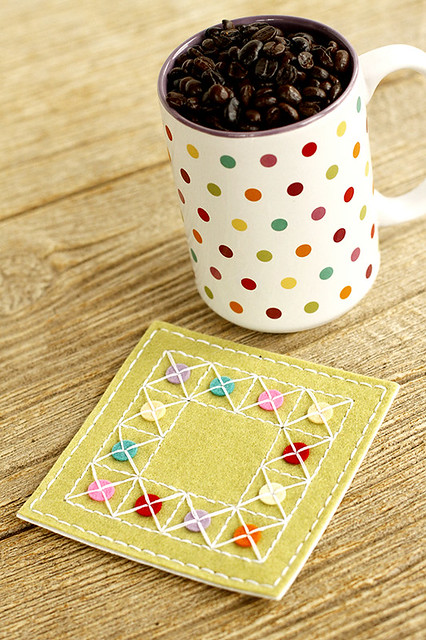
The whole dot treatment was inspired by a new coffee mug I recently got at Michael's. (They still have them, if you want them. Just bought this last week.) Fun to make your coaster match your mug. See what I mean by a blank canvas to just play with to your little stitching heart's content? What will you be inspired to create?
To show you the rest of the packaging, I have a few more photos. The open boxes on the sides were stamped with a small sentiment from Betsy's Petite Places: School.
On the back, I stamped borders and a sentiment from Seeds of Knowledge.
So, Stitched Medallion 1. This little sweetie surprised me. I thought there was only one way to stitch her up. Turns out, you can let your creativity take you away on it and do all sorts of things. Here, on this coaster, I used one of the dies from Stitched Medallion 1 to add circles to the center of my Stitched Coaster cut with Stitched Coaster Square Flair.
The whole dot treatment was inspired by a new coffee mug I recently got at Michael's. (They still have them, if you want them. Just bought this last week.) Fun to make your coaster match your mug. See what I mean by a blank canvas to just play with to your little stitching heart's content? What will you be inspired to create?
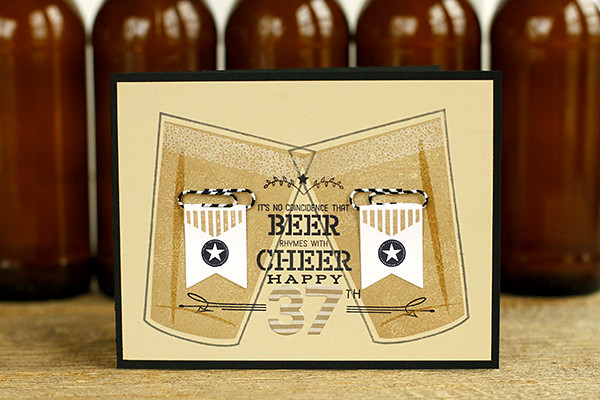
With all this stitching going on, Craft Brew's got left behind. Can't let that happen. This set is too fun for that. One last card for you. I've got two glasses clinking here in celebration and the space that is created in between is the perfect location for a sentiment from the set. I added "happy" from one of the Keep It Simple sets and the Modern Number Dies add the age between the border from Craft Brew. Bits and pieces from Betsy's Clipsters set (really...I want to use this one all the time with Craft Brew, great companion) add the perfect embellishments.
A note on the glasses here. The beer was stamped in Classic Kraft ink on Fine Linen card stock. I added the foam with Fresh Snow ink. The glass accents were stamped in Versamark and heat embossed with clear powder for a realistic look. Love it!
OK. That's a lot of goodness. More tomorrow. I have projects already done and ready to go. Looking forward to sharing those with you.
More inspiration can be linked through Nichole's blog post today.
All these new goodies will be available on May 15th at 10 PM EST at www.papertreyink.com. Looking forward to seeing your creations with them. And, as always, thanks for stopping by!
Supplies
Thanks Craft Brew Card + Coaster
Stamps: Craft Brew, Keep It Simple: Thank You, BB: Random Stripe
Dies: Craft Brew, Sentiment Splits: Vertical Angle, Stitched Coaster Dies
Ink: Fine Linen, Summer Sunrise, Blueberry Sky, Enchanted Evening
Cardstock: Blueberry Sky, Stamper's Select White, Classic Kraft
Felt: Classic Kraft, Dark Chocolate
Coffee Mug and Coaster
Stamps: Cuppa Love, Quick Stitch Kit: Sewing Staples
Dies: Stitched Coasters, Floral Cluster 1, Quick Stitch Kit: Sewing Staples, Cross Stitched Alphabet,
Cuppa Love Mug, Pint Size Wrap
Ink: Harvest Gold, Simple Chartreuse, Aqua Mist
Aqua Mist Bitty Dot and Harvest Gold Simple Stripe Patterned Paper
Simply Chartreuse Satin Ribbon
Aqua Mist, Simply Chartreuse, Vintage Cream, Harvest Gold Felt
Rainbow Flair Coasters
Dies: Stitched Coasters, Stitched Coasters: Square Flair
Cork Sheets
Smokey Shadow Felt
Medallion Key Fobs + Packaging
Stamps: Just a Little Something, Seeds of Knowledge, Petite Places: School
Dies: Stitched Key Fobs, Stitched Medallion 1, Cross Stitched Alphabet, Vintage Favor Box,
1.75" Limitless Layers Circles
Cardstock: Pure Poppy, Hibiscus Burst, Aqua Mist, Simple Chartreuse
Ink: Fresh Snow, Dark Chocolate
Papertrey Ink Felt
Polka Dot Coaster
Dies: Stitched Coaster Dies, Stitched Coaster: Square Flair, Stitched Medallion 1
Papertrey Ink Felt
Beer Rhymes with Cheer Card
Stamps: Craft Brew, Clipsters, Keep It Simple: Anniversary
Dies: Modern Numbers, Clipsters
Cardstock: Stamper's Select White, Fine Linen
Ink: Classic Kraft, True Black, Fresh Snow
Classic Kraft Simple Stripe Patterned Paper
No comments:
Post a Comment